Showing posts with label DIY. Show all posts

Tuesday, December 29, 2015

Upcycled guitar picks for the novice and expert players


Upcycled guitar picks are available right now from Wisdom Lane, and each package contains 10 picks.

*These are the light gauge guitar picks

You may choose from a light gauge for the lighter gauge strings on your guitar or a medium gauge pick for strumming and single note playing.

*These are the medium gauge guitar picks

Beginners often prefer lighter gauge strings which are easier on their fingers—but medium gauge picks can often break these strings.

The picks feature oddball colors like green and blue, which are easier to see on the carpet or floor.  These picks have been reinvented using lids and even plastic plates.

You can see the light gauge picks in my Etsy shop here.

You can see the medium gauge picks in my Etsy shop here.

Like all items offered at Wisdom Lane—they are better with age.

Wednesday, October 7, 2015

Mix and match Cocktail, iced tea, or lemonade sets


Having a get together?  Looking for that WOW addition to your table?  A mix and match cocktail set would be the perfect way to go.

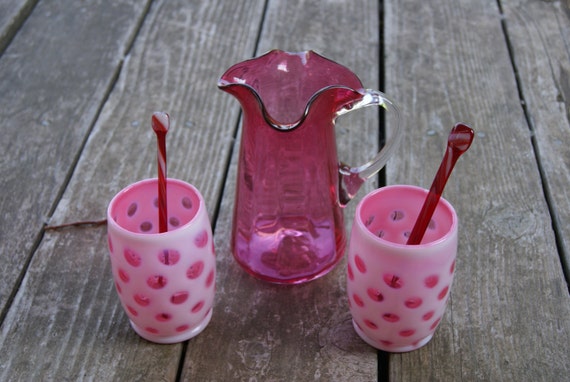
Collectible Mix And Match Cocktails For Two Cranberry And White Pitcher Two Stir Sticks And Two Fenton Coin Dot Barrel Shaped Tumblers 

They can even be tailored to the size if the get-together.  The set above is perfect for when there's two people.  You can see this set in my Etsy shop here.

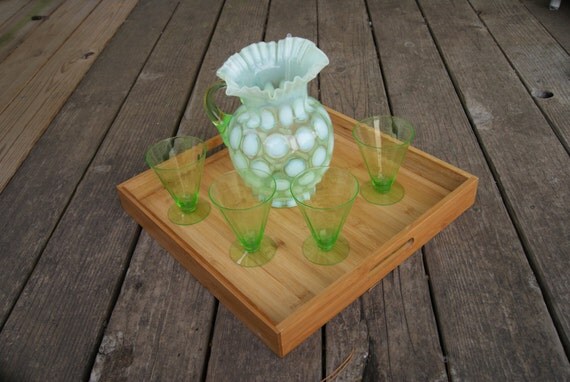
Another way to go is a set like this for when you have a few more than two people coming over.

Mix And Match Cocktail Or Lemonade Set With Green Fenton Coin Dot Pitcher 4 Green Depression Glass Tumblers And Crystal Stir Stick 

You can see this great set in my Etsy shop here.  There's also a wide variety of colors that you can use.  Purple, cranberry or amber glass are a very small amount that's out there.  Using a focal point like the pitcher or the tumblers above makes the set even better. 

Whether you use these sets for cocktails or iced tea, these sets are sure to bring a “where did you get this?” response from your guests.  These would also make for an unexpected one-of-a-kind gift.

Have you mixed and matched a set like this?

Wednesday, September 16, 2015

How do you wire a lamp?


You are walking through your favorite flea market or antique mall and you see a lamp that would look great in your house or apartment.  You start to look at it to see what kind of shape it’s in, and you notice the cord is frayed.  How do you change it so that you can use the lamp?

The first thing you need to find is a replacement cord.  A local home improvement store will more than likely have a replacement for you.


The next thing that you need to do is to disassemble the light socket so that you can get access to where the cord attaches.


When you get the main cover of the socket off, you will notice that the end of the cord that you are going to replace is held on by a couple of screws.  All you need to do is to unscrew the cord and slide the cord out at the base of the lamp.


A piece of advice: I would look at the socket before I did anything else.  I’ve seen sockets with rust, corrosion and damage to where it would be unsafe to turn the lamp on.  If there’s anything wrong with the socket, it’s a good idea to replace it now.  More often than not, you’ll get a replacement socket when you buy the cord. 


When you purchase a new cord at a home improvement store, it will have the end of the cord already stripped for you so that you can reattach it without having to worry about stripping the wire.  After you get the new cord on, pull on the cord at the bottom of the lamp to remove all of the extra slack that you gave yourself.

Installation of the cord is just as easy as removing it.  The first step is to feed the cord through the lamp in the area where you removed the old one.  When you get the cord all the way through the lamp, leave yourself a little extra room so that you can attach the light socket.


After you take out the extra slack in the cord, all you have to do is to put the cover on the light socket.  If I were you, I would put a light bulb in it and plug it in to see if it works before I did anything else.


When it works, you can put on the lamp shade and proudly display your latest find.  What kinds of finds have you run across that needed a little repair work like this?